| Calendar |
< May, 2024 >
| S |
M |
T |
W |
T |
F |
S |
| 28 |
29 |
30 |
01 |
02 |
03 |
04 |
| 05 |
06 |
07 |
08 |
09 |
10 |
11 |
| 12 |
13 |
14 |
15 |
16 |
17 |
18 |
| 19 |
20 |
21 |
22 |
23 |
24 |
25 |
| 26 |
27 |
28 |
29 |
30 |
31 |
01 |
|
|
| Farmer Al's Tractor Pull Toy |
Introduction
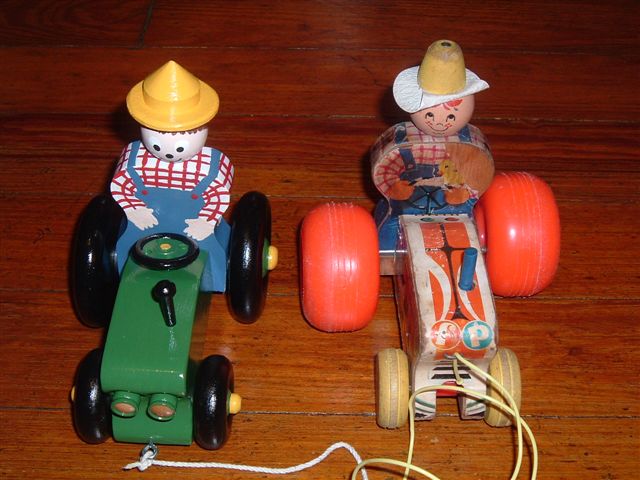
Farmer Al's Tractor Pull Toy was inspired by a toy I had when I was a toddler. It was a Fisher Price tractor that waddled back and forth as it was pulled along the floor. For more details about the original Mighty Tractor check out This Old Toy's description . My mom kept mine in the attic all this time. When my nephew was old enough to walk she pulled it out of the attic, cleaned it off and gave it to him to play with. As Christmas 2007 approached, due to the lead paint scare that summer, our family decided that we should try to build my nephew some toys rather than risk his health. We talked about finding something simple to make since we were short on time. After thinking about it for a little while, I realized the old Fisher Price tractor wouldn't be that hard to reproduce. My version was named in honor of my great uncle Al who owns a small farm in Dover, Ohio, one of my all time favorite places in the world. It is painted with non-toxic paints and finished with a few coats of clear shellac which is all natural and non-toxic as well.
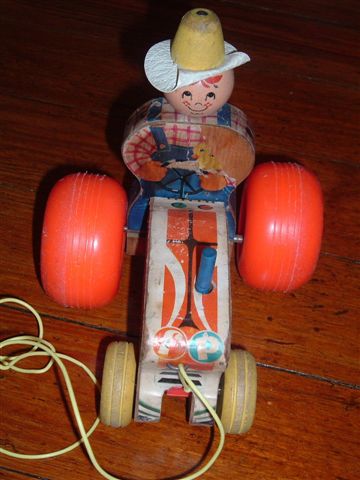
Below you will find some very simple steps used to reproduce most of the features of this old toy. However, we did not replicate the clicking noise it once produced. This was partially due to the fact that it no longer worked and also because of our limited time frame.
Step 1
Using the pattern below, trace the tractor body on to scrap 2X4 stock. I used pine because that's what I had laying around the shop. Then cut out the body using your favorite tool. This body was cut out using a scroll saw, but a band saw, jig saw or coping saw would work just as well.
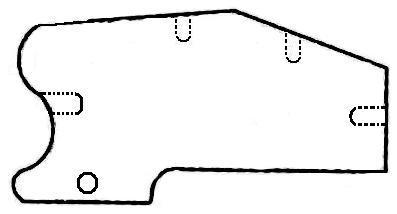
The dotted lines indicate the placement of holes for the headlights, the smoke stack, the steering wheel and the body pivot point. The circle indicates the placement of the hole used for the tractor's front axles.
Step 2
Using the pattern below, trace the farmer Al's body on to scrap 1X2 stock. Again, I used pine and a scroll saw.
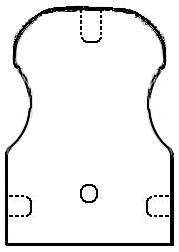
The dotted lines indicate the holes used to attach Farmer Al's head as well as the holes used to attach the tractor's rear axles. The circle is the location of the hole used to attach Farmer Al's body to the tractor body via the pivot pin.
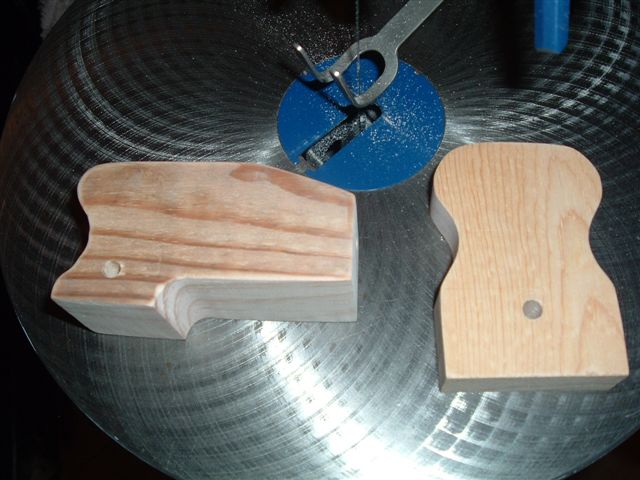
The rough cut tractor and Farmer Al bodies should look like the image below.
Step 3
Drill holes in tractor body for the smoke stack (I used another axle for this stack), the front axles, steering wheel, headlights, and the pivot point (another axle) for Farmer Al’s body. The steering wheel and headlights were purchased on-line but can also be found at your local craft store.
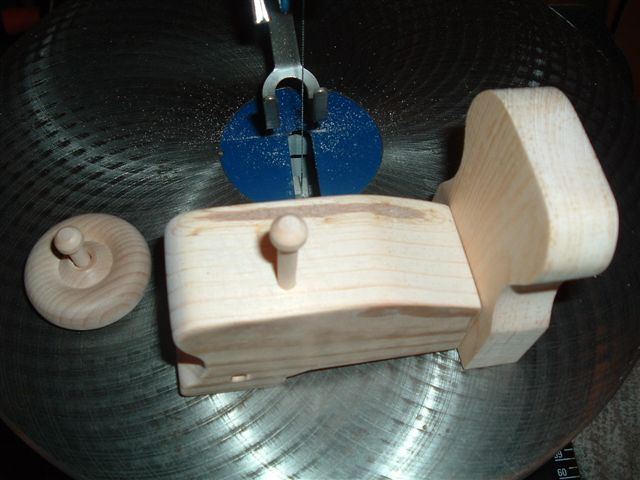
Next, drill the holes in Farmer Al’s body for the rear axle and head. Then offset holes on the back side of the 2 rear wheels about 1/4" from the factory drilled holes taking care not to drill the holes all the way to the finished side. I used factory made wheels because they look better than what I can produce with my limited equipment and they are not very expensive. You can find them on-line or at your local craft supply store.
Step 4
Make Farmer Al's hat from a 3/4" dowel rod and 1/4" luan. Drill a 1/4" hole through a 1 1/2" wooden ball (head), through the luan and partially into dowel rod. Using a small piece of 1/4" dowel rod, test fit the head and hat sub-assembly. Fine sand all the parts. The prototype had a pointed hat, but for safety reasons the final product had a gently rounded hat more closely representative of the hat on the Fisher Price inspiration.
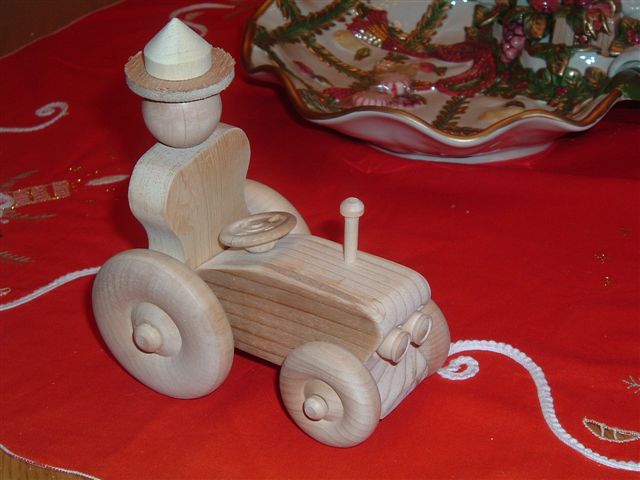
Test fit all the pieces and then finish sand each piece before final assembly.
Step 5
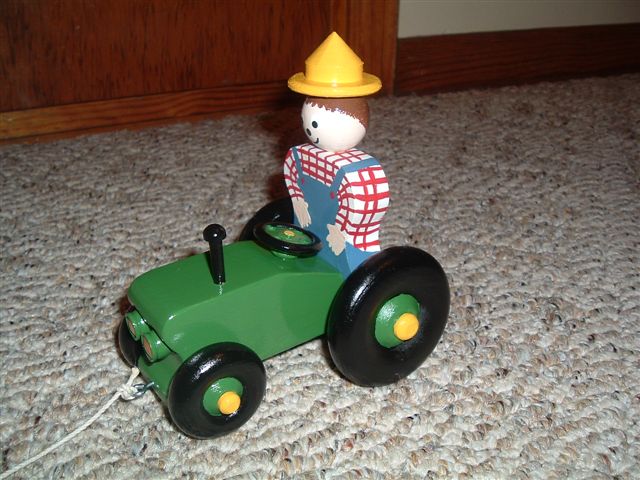
After some glue and more sanding, paint Farmer Al's Tractor Pull Toy in a color scheme of your choice. In this case, Farmer Al’s tractor is painted with a JD color scheme because this one was for my nephew whose father is a big JD fan. However, the real Farmer Al usually drove an AC. So, the next version of Farmer Al will be in an orange color scheme.
Step 6
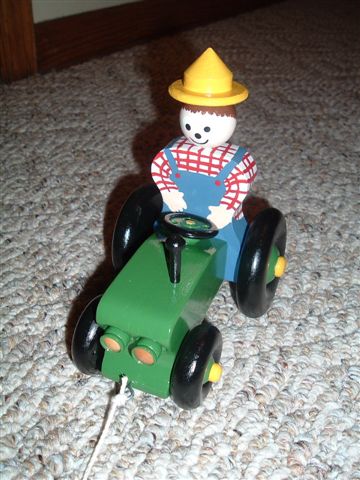
Attach an eye hook to the front of the tractor and another one to a round wooden ball. Then tie a string between the two. Finally, staple a small piece of elastic to the underside of the assembled toy. One end of the elastic should be attached to the tractor body and the other end attached to Farmer Al's body. The elastic stops the tractor from spinning out of control. Finally, give it to you favorite tractor loving toddler and watch them have hours of endless fun pulling Farmer Al around the house.
Created on 11/18/2008 01:27 AM by admin
Updated on 10/22/2009 04:43 PM by admin
|

|
|
|
